![]()
![]()
![]()
![]()
![]()
![]()
Here is a sample of what you will find in lesson 24 of the downloadable Tutorial on Excel macros
Lesson 24 on Excel macros (VBA):
Forms (Userforms) in VBA for Excel
When the message box or the input box are not sufficient any more to communicate with the user you need to start developing userforms.
The form is used to require information from the user to feed the VBA procedure. Different basic controls can be added to the userform they are called: labels, text boxes, combo boxes, list boxes, check boxes, option buttons, frames, command buttons, spin buttons and images . To learn more about all the controls see lessons 26 to 33.
Creating a Userform in Excel
Userforms are created in the Project Window of the Visual Basic Editor. You will also find the toolbox that allows you to add controls to your userforms in the Visual Basic Editor.
In the Visual Basic Editor you right click in the project window and you will see this menu appear:

Go to "Insert" and select "UserForm". You will then see the following:
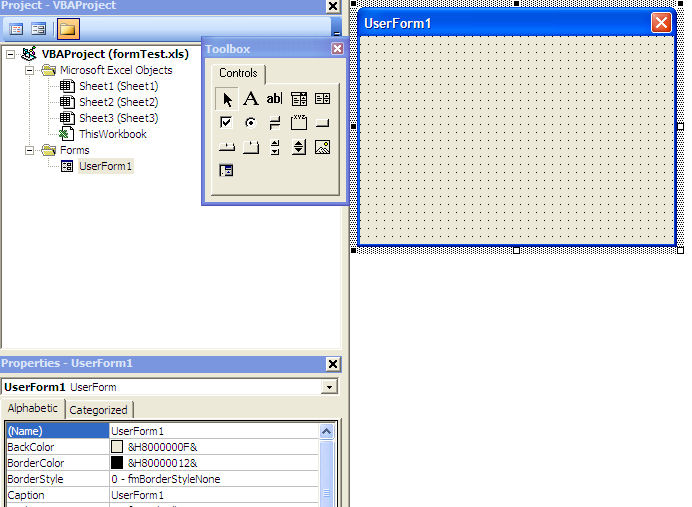
On the right you see the userform that you have just added to your workbook. On the left is the toolbox with all the controls that you can add to your userform. You can hide that toolbox by clicking on the "X" and bring it back by clicking on the toolbox icon ![]() or by going to the menu bar "View/Toolbox". We will use the toolbox later in this section.
or by going to the menu bar "View/Toolbox". We will use the toolbox later in this section.
We hope you have enjoyed this introduction to lesson 24
for more on this topic and a complete course on Excel macros download the
Tutorial on Excel Macros
Next Lesson: Userforms Properties and VBA Code